Zay Aung

Dynamics 365, Power Platform, and everything in between

Tag: Custom Trigger

  • Sending Internal Email Upon Form Submission: Create Real-time Journey (Part 4 of 4)

    Create Real-time Journey

    This is the last post of this series. In this post, we’ll bring everything together by building a Real-time Journey in Customer Insights – Journeys that sends an email to the internal team based on the contact’s location.

    Create the Real-Time Journey

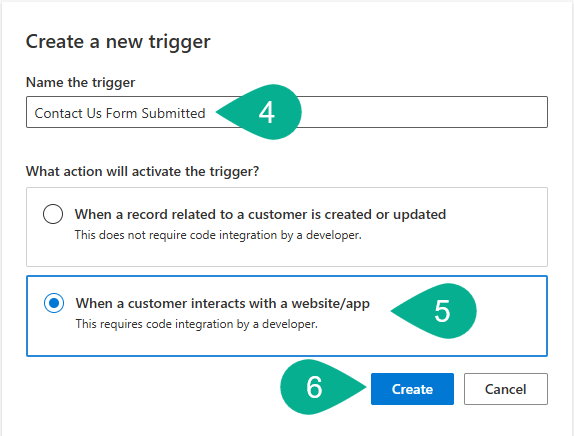
    • Create a Real-time Journey with the below configurations. It’s optional to select “Contact Us”, however, in this example, we’re going to select the Form we’ve created in the previous post [Part 1].

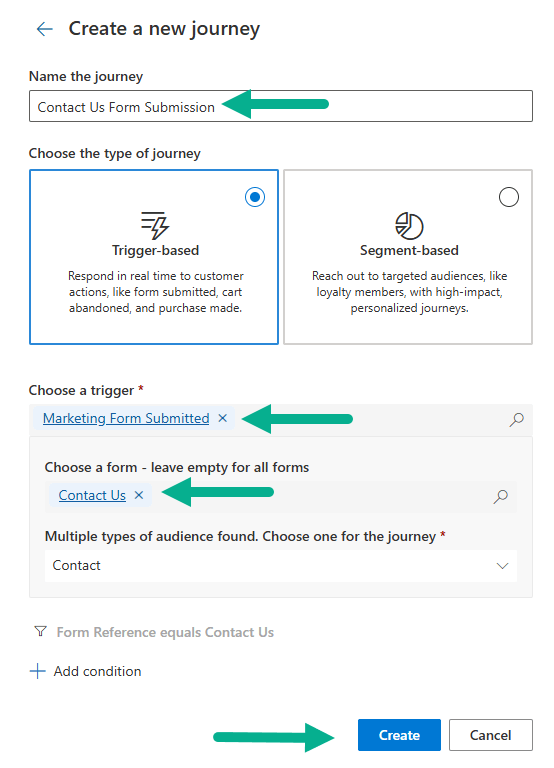
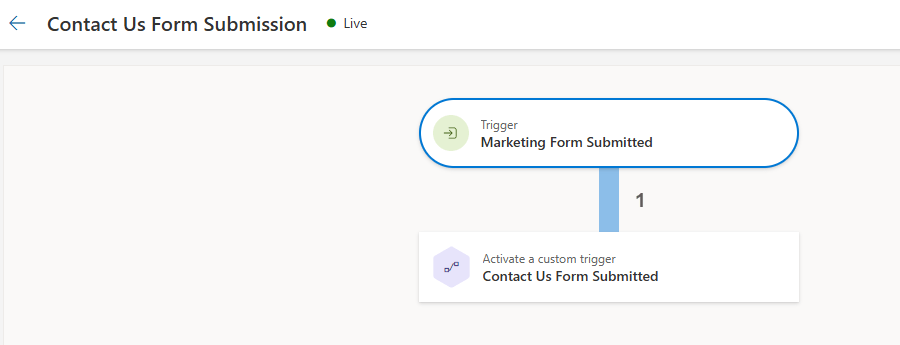
    Below is a simple journey where Contact will enter to this journey upon submitting Contact Us Form.

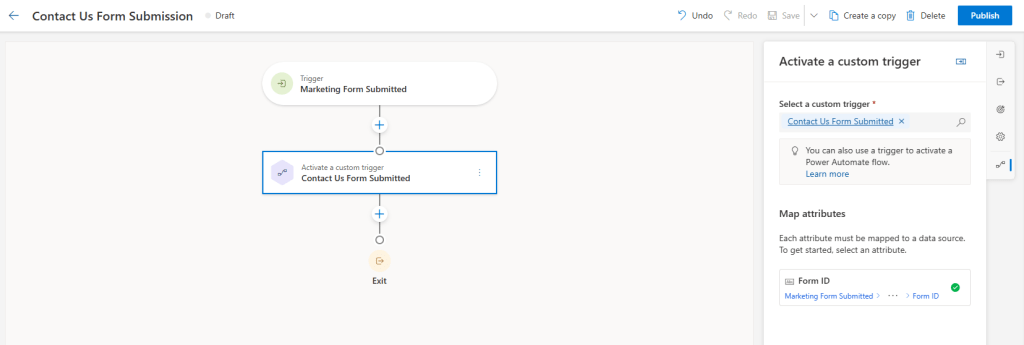
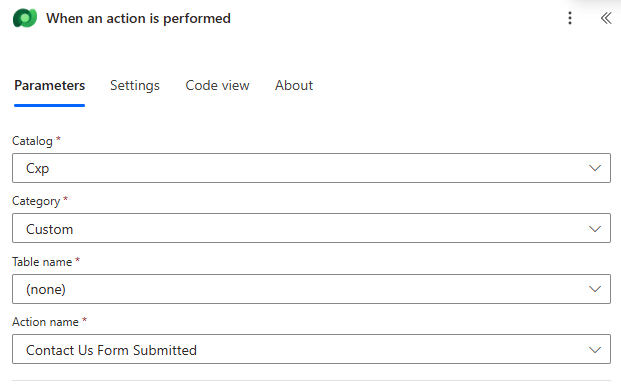
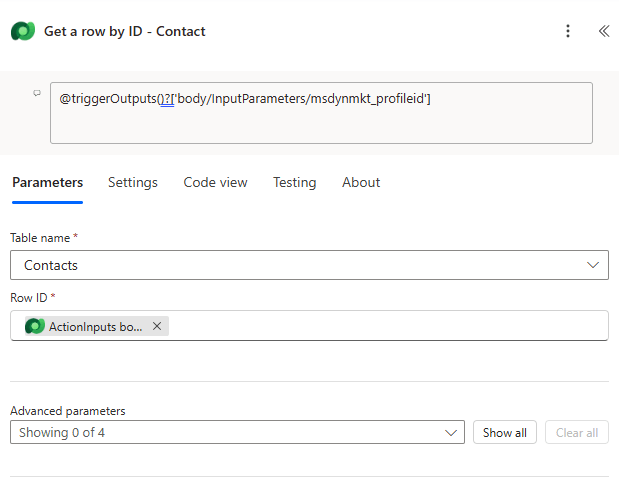
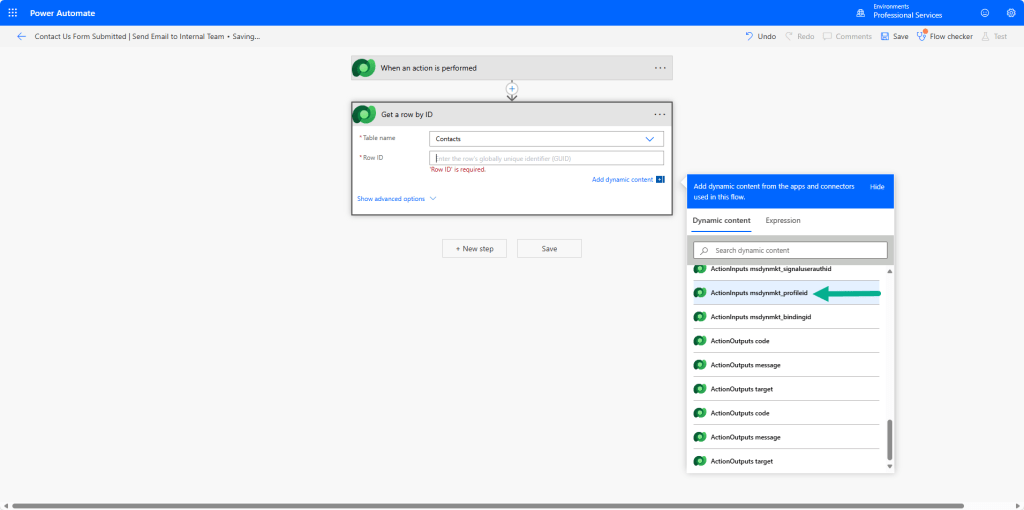
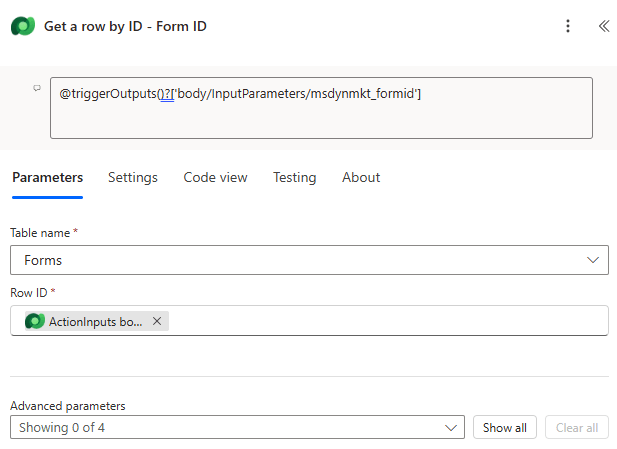
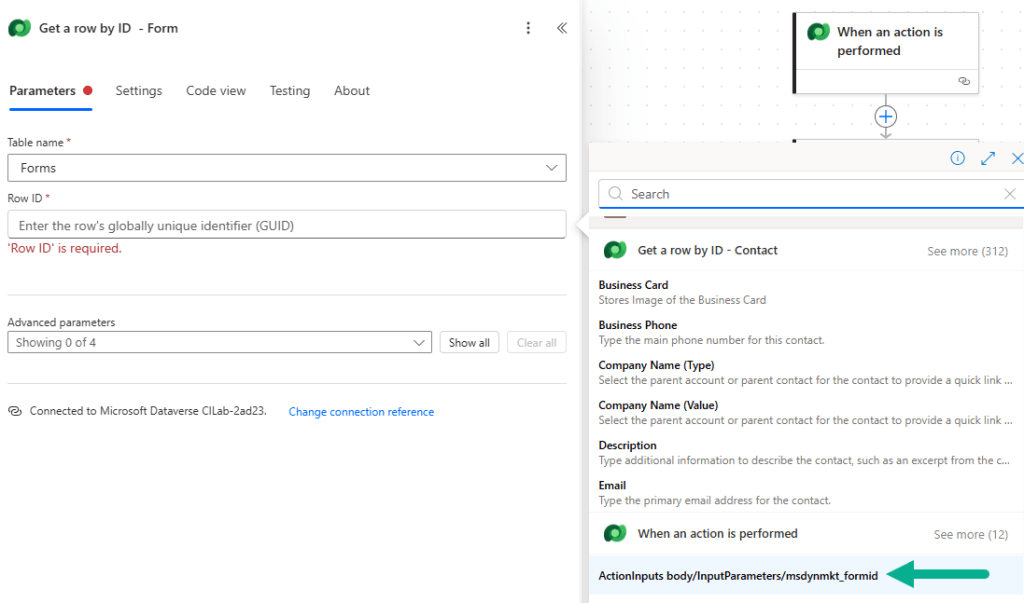
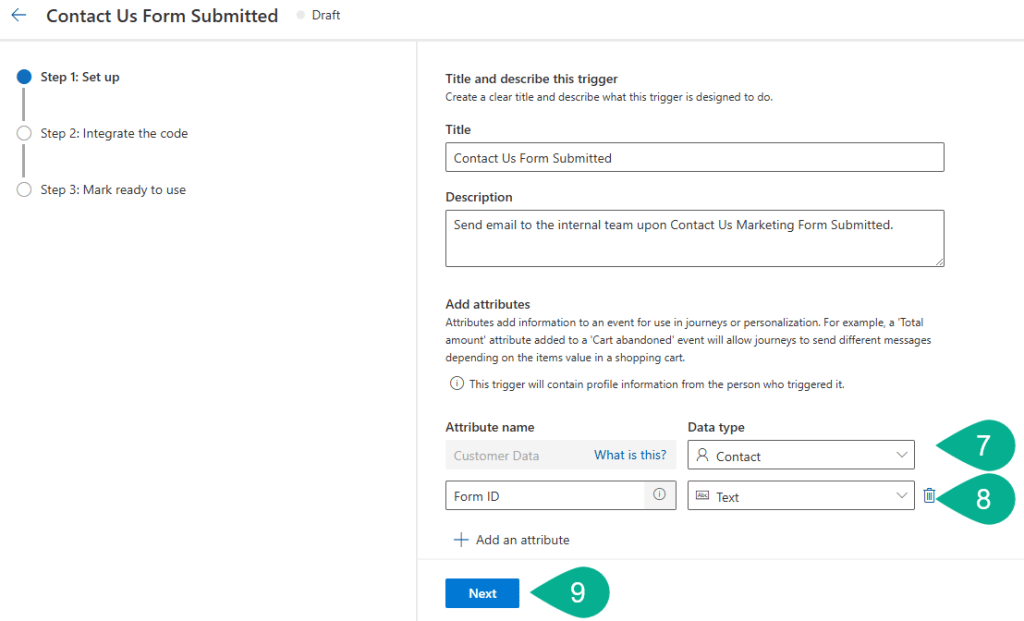
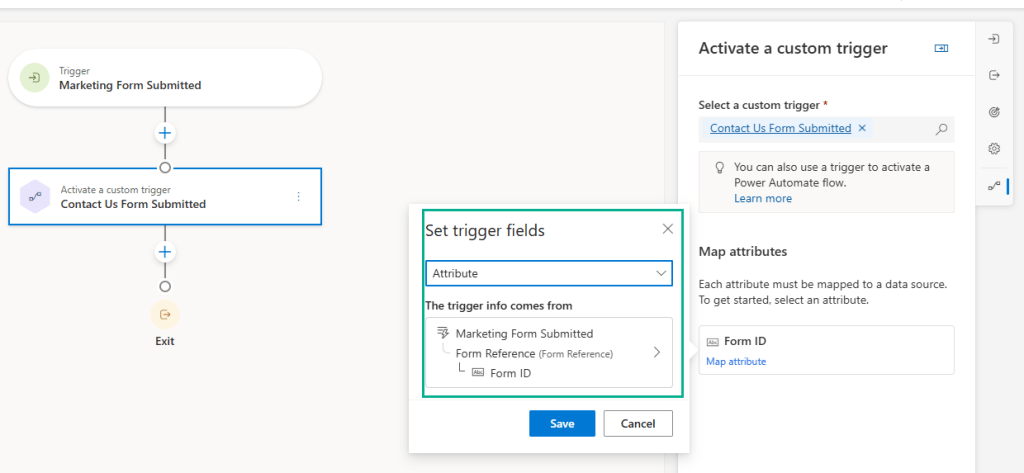
    Below is the definition of Form ID – which we’ve configured in the Custom Trigger in [Part 2]. This is being used in the [Part 3] to retrieve Form Details in Power Automate Flow.

    Once the journey is configured, Publish.

    Testing and Verification

    Publish the Form

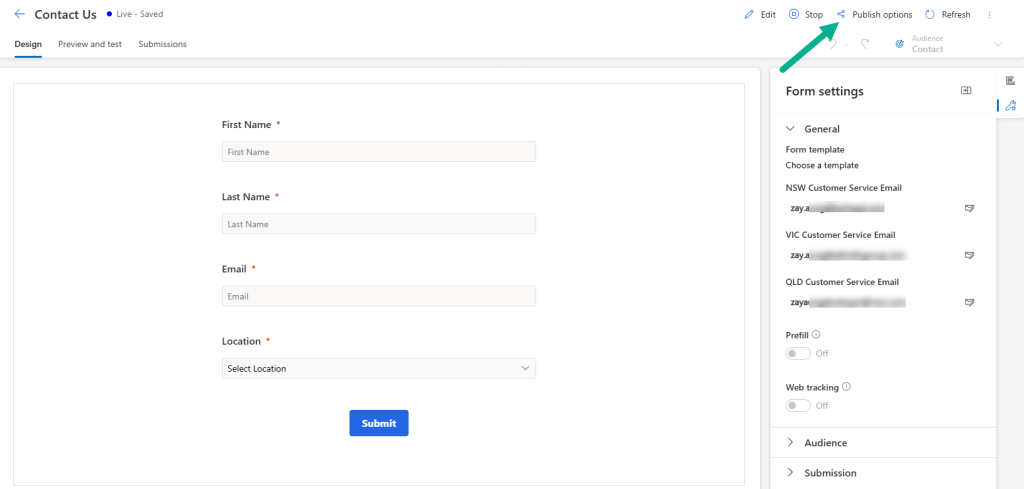
    Now, go back to the Contact Us Form created in [Part 1]. Follow the below steps.

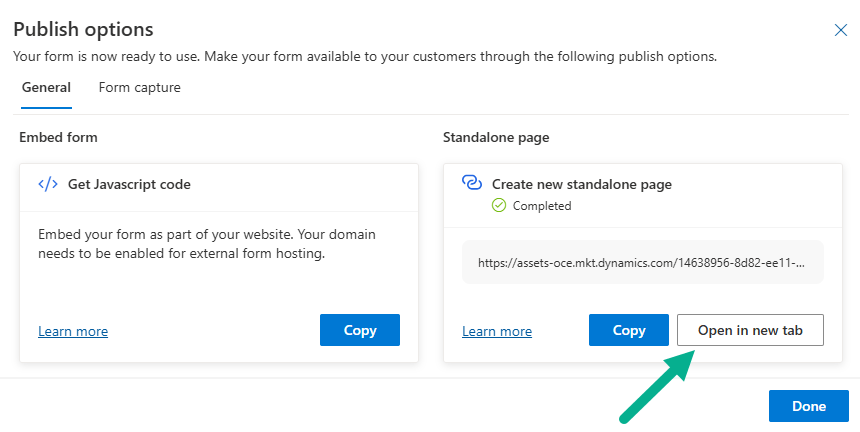
    • Click Publish options
    • Click Open in new tab to launch the form in a standalone view
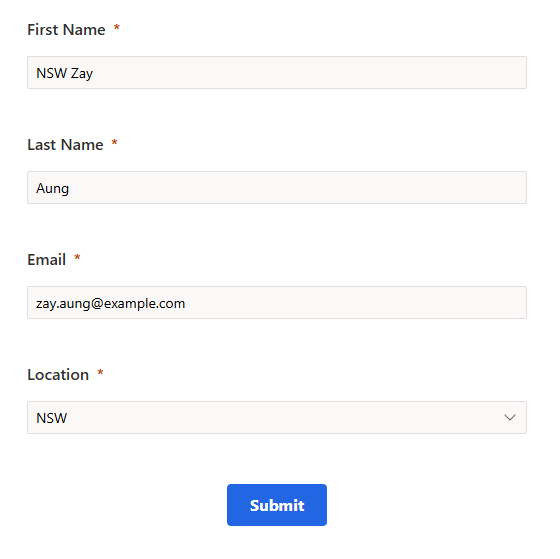
    Submit the Form

    • Fill in the required details (e.g., First Name, Email, Location).
    • Click Submit.

    Check Form Submission

    Once the Form is submitted, go to the Form -> click “Submissions” tab. The new submission record with recently created submitted details should be created.

    Verify the Journey

    Navigate to the Real-time journey created, and confirm that the contact has entered the journey based on the form submission.

    Confirm Power Automate Flow Execution

    You can also verify Power Automate Flow by checking the history. You should see a successful run tied to the form submission.

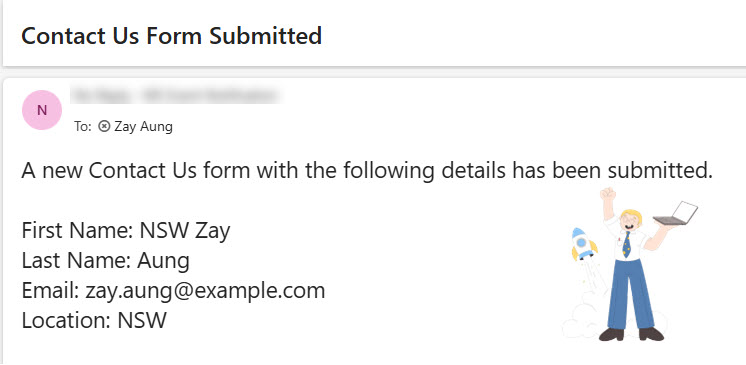
    Confirm Internal Email Receipt

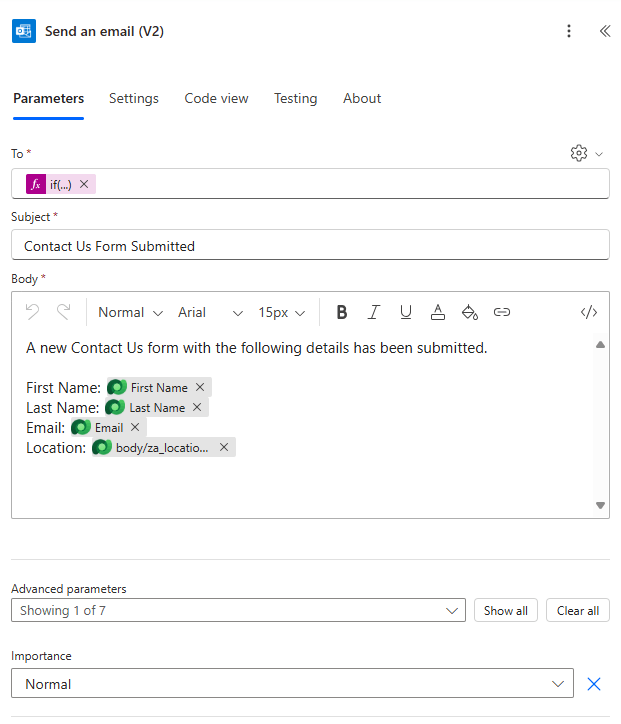
    If everything is working correctly, the internal email address (defined in the marketing form) should receive the email based on the contact’s location.

    Summary

    In this final post, we’ve:

    • Created and published the Real-time Journey
    • Submitted the form and verified each component:
      • Form submission
      • Journey trigger
      • Power Automate execution
      • Internal email delivery

    It’s just one of the examples, and you can reuse across similar scenarios – for example – event registration.

  • Sending Internal Email Upon Form Submission: Build Power Automate Flow (Part 3 of 4)

    Build Power Automate Flow

    In this post, we’ll walk through how to build a Power Automate flow to send emails to internal teams based on the contact’s location, as defined in the Real-time Marketing Form.

    We’ll create the flow within the same solution where we previously created the custom columns for the Contact and Form tables.

    Create Power Automate Flow

    • Go to Power Automate and create a new Automated Cloud Flow
    • Give it a name – in this example:
      • Flow Name: Contact Us Form Submitted | Send Email to Internal Team

    Flow Overview

    We’ll use the following actions in the flow:

    • When an action is performed (Custom Trigger)
    • Get a row by ID – Contact
    • Get a row by ID – Form ID
    • Send an email (V2)

    When an action is performed

    Here’re the definition of each action.

    • Add the When an action is performed action
    • Select the Custom Trigger we created in [Part 2] — in this case: Contact Us Form Submitted

    This ensures the flow runs every time the trigger is triggered in the Real-time Journey.

    Get a row by ID – Contact

    • Add “Get a row by ID” action
    • Table name: Contacts
    • Row ID: ActionInputs msdynmkt_profileid (This retrieves the contact record based on the profile ID from the Real-time Form submission)

    Get a row by ID – Form ID

    • Add another “Get a row by ID” action
    • Table: Forms
    • Row ID: ActionInputs body/InputParameters/msdynmkt_formid (This retrieves the form used during the submission.)

    Send an email (V2)

    • Add “Send an email (V2)” action
    • In the To field, I’ve used the following expression to dynamically select the internal email address defined in the Form based on the contact’s location:
    if(equals(outputs('Get_a_row_by_ID_-_Contact')?['body/za_location@OData.Community.Display.V1.FormattedValue'],'NSW'),outputs('Get_a_row_by_ID_-_Form_ID')?['body/za_nswcsemail'],if(equals(outputs('Get_a_row_by_ID_-_Contact')?['body/za_location@OData.Community.Display.V1.FormattedValue'],'VIC'),outputs('Get_a_row_by_ID_-_Form_ID')?['body/za_viccsemail'],if(equals(outputs('Get_a_row_by_ID_-_Contact')?['body/za_location@OData.Community.Display.V1.FormattedValue'],'QLD'),outputs('Get_a_row_by_ID_-_Form_ID')?['body/za_qldcsmail'],'')))

    This is optional depending on your use case. However, I’ve included the below expression to include the location in the body.

    outputs('Get_a_row_by_ID_-_Contact')?['body/za_location@OData.Community.Display.V1.FormattedValue']

    Once done, Publish the Flow.

    Summary and Next Steps

    In this post, we’ve:

    • Created a Power Automate flow that listens to a custom trigger
    • Retrieved Contact and Form data
    • Dynamically selected and sent an email to the appropriate internal team

    In the final post [Part 4], we’ll build the Real-time Journey and show how all components – the form, custom trigger, and flow – come together in action.

  • Sending Internal Email Upon Form Submission: Configure Custom Trigger (Part 2 of 4)

    Configure Custom Trigger

    This is the part 2 of this series. In this post, we’ll walk through how to create a Custom Trigger in Real-time Journeys. This trigger will later be used to call a Power Automate flow, which sends an internal email based on the contact’s location.

    Create the Custom Trigger

    1. Navigate to Real-time journeys area
    2. In the left pane, go to Engagement Triggers
    3. Click + New trigger
    1. Enter a name for your trigger
    2. Select “When a customer interacts with a website/app option”
    3. Click Create

    Configure the Trigger

    1. Under the Customer data section, select Contact
    2. Create a new attribute and give name called Form ID. Select Text data type
    3. Click Next
    1. Click Next as we’re not going to integrate with a web page.
    1. Click Ready to use

    Once ready, the Status of the trigger will update to Ready to use, confirming it’s active and available for use in your Real-time Journey.

    Summary and Next Steps

    In this post, we’ve created a Custom Trigger that will serve as the connection point between the Real-time Journey and Power Automate.

    In the next postBuild Power Automate Flow (Part 3), we’ll build a Power Automate flow that listens to this trigger and sends an email to the appropriate internal team based on the contact’s location.