

Configure Custom Trigger
This is the part 2 of this series. In this post, we’ll walk through how to create a Custom Trigger in Real-time Journeys. This trigger will later be used to call a Power Automate flow, which sends an internal email based on the contact’s location.
Create the Custom Trigger
- Navigate to Real-time journeys area
- In the left pane, go to Engagement → Triggers
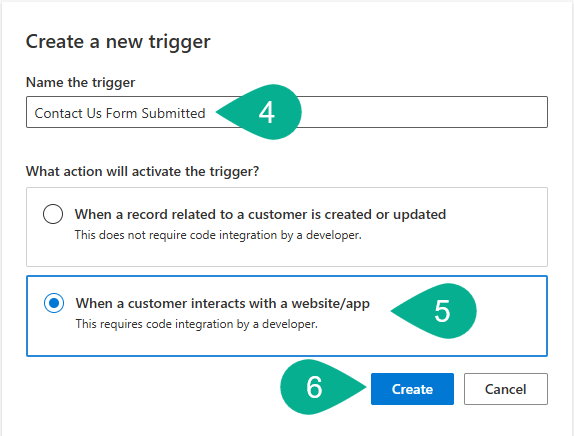
- Click + New trigger

- Enter a name for your trigger
- Select “When a customer interacts with a website/app option”
- Click Create
Configure the Trigger
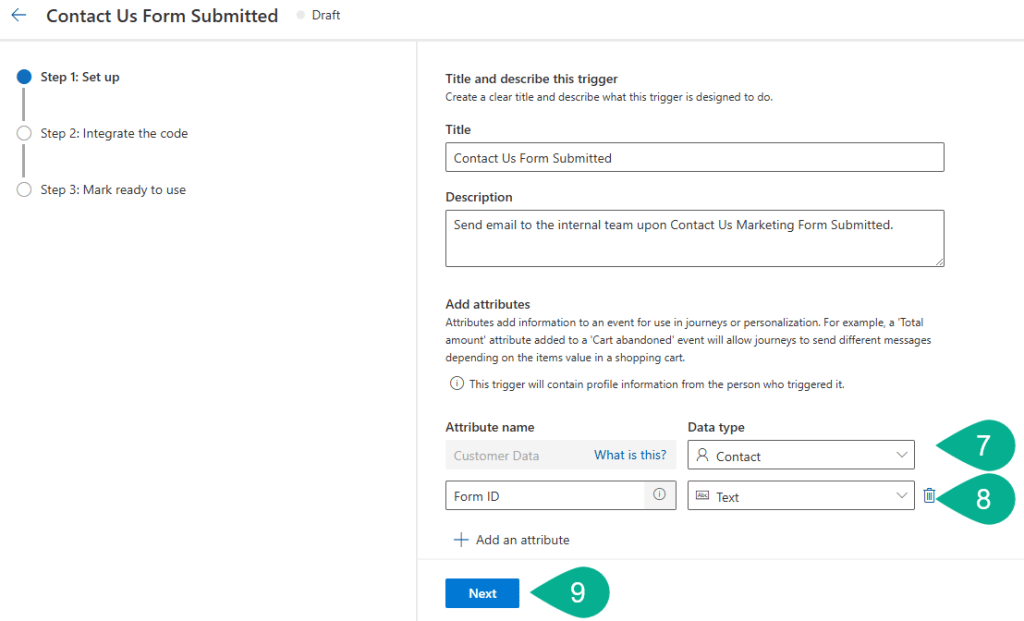
- Under the Customer data section, select Contact
- Create a new attribute and give name called
Form ID. SelectTextdata type - Click Next
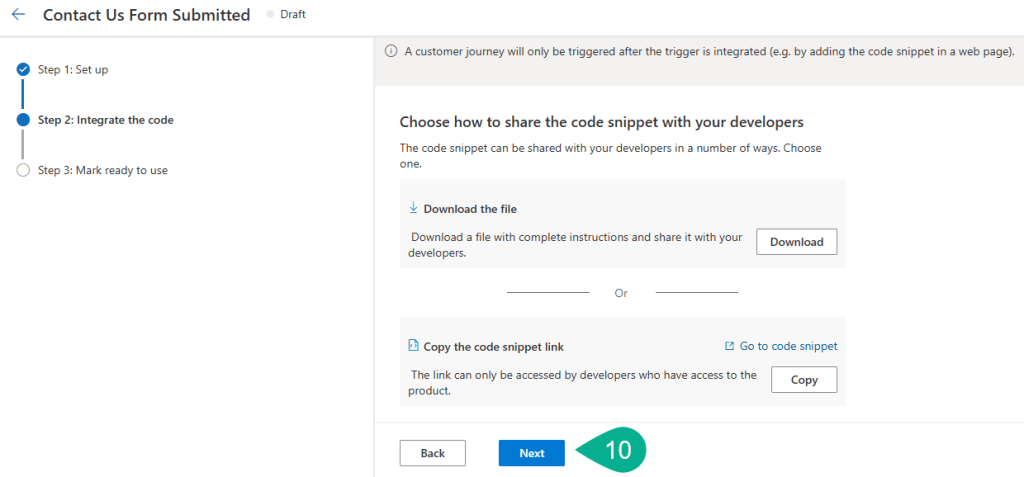
- Click Next as we’re not going to integrate with a web page.
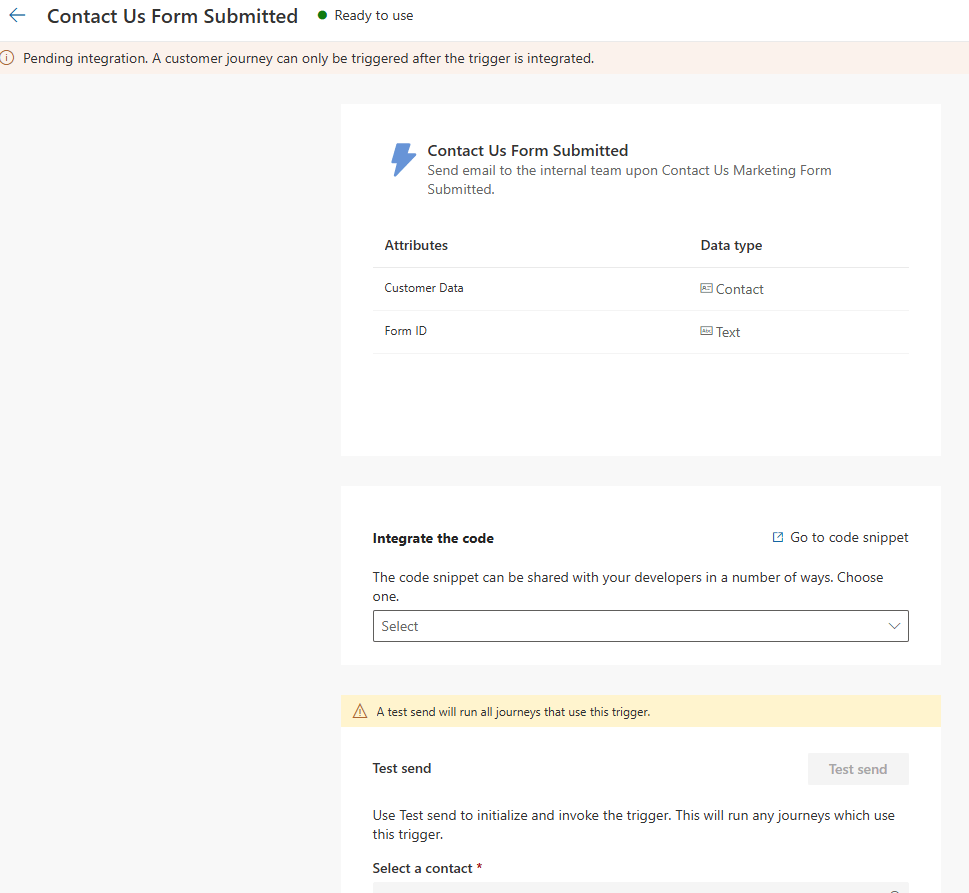
- Click Ready to use

Once ready, the Status of the trigger will update to Ready to use, confirming it’s active and available for use in your Real-time Journey.
Summary and Next Steps
In this post, we’ve created a Custom Trigger that will serve as the connection point between the Real-time Journey and Power Automate.
In the next post – Build Power Automate Flow (Part 3), we’ll build a Power Automate flow that listens to this trigger and sends an email to the appropriate internal team based on the contact’s location.
