
In this blog post, I’ll walk you through how you can capture inbound SMS messages sent to your Twilio number, bring them into Dataverse, and trigger actions such as updating Text Message Contact Point Consent records in Dynamics 365 Customer Insights – Journeys (CI-J).
TL;DR – The Solution
Customer texts “STOP” → Twilio catches it → Sends webhook to Power Automate → Updates consent in Customer Insights – Journeys
What You’ll Need
To follow along, of course, you’ll need a Twilio number (trial or paid) to send SMS. For me, I’ve created a trial account that allows to send text message to the verified number. If you already have a Twilio number, you can skip the trial account setup. Otherwise, sign up for a free Twilio trial, verify your mobile number, and you’re good to go.
Use Case Example
Consider you’re running SMS campaigns through Customer Insights – Journeys using Twilio. Someone gets your promotional text and replies “STOP” because they’re not interested anymore.Twilio stops sending them messages (which is good), but your Customer Insights – Journeys has no clue they opted out.
The result? Your reports show they’re still Opted In for Text Message, your data is wrong, and you might accidentally try to reach them again via the Text Message channel.
Supported SMS Providers
You can use below providers to send text messages in Customer Insights – Journeys. However, in this blog, I’ll be using Twilio to show you how you can receive inbound message.
- Azure Communication Services
- Infobip
- LINK Mobility
- TeleSign
- Twilio
- Vibes
Understanding STOP/START Keywords in Twilio
In general, there’re some keywords reserved for SMS Stop filtering as industry standards – examples are STOP, UNSUBSCRIBE, STOPALL , CANCEL, REVOKE or OPTOUT. This, of course, applies to Twilio too. So When someone replies with a STOP keyword, Twilio adds the sender’s number to a block list and stops sending SMS to them. To resume, the user can reply with START, YES, or UNSTOP.
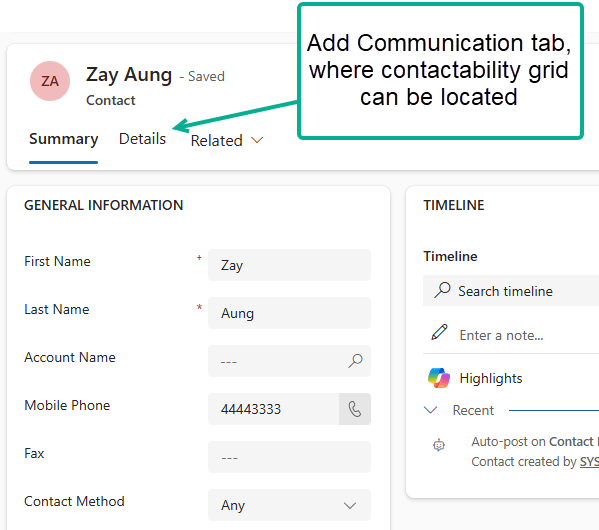
By default, Twilio does not forward these inbound replies (or any replies) to Dynamics 365. You must configure an inbound webhook for Customer Insights – Journeys to “catch” the responses. More details here.
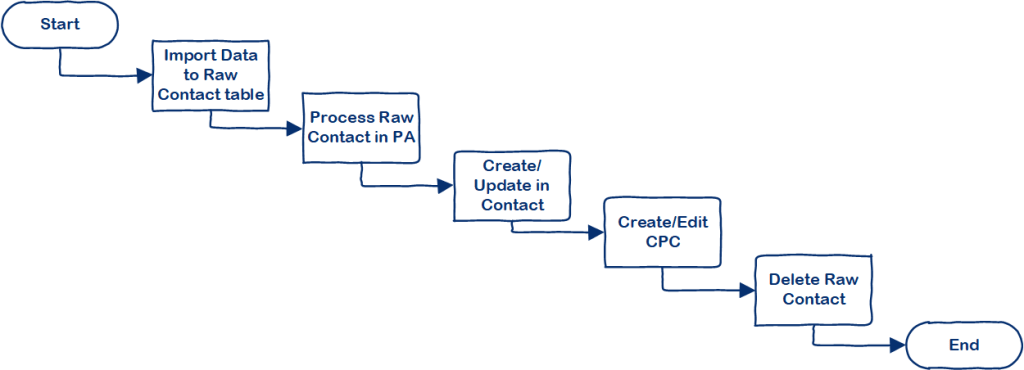
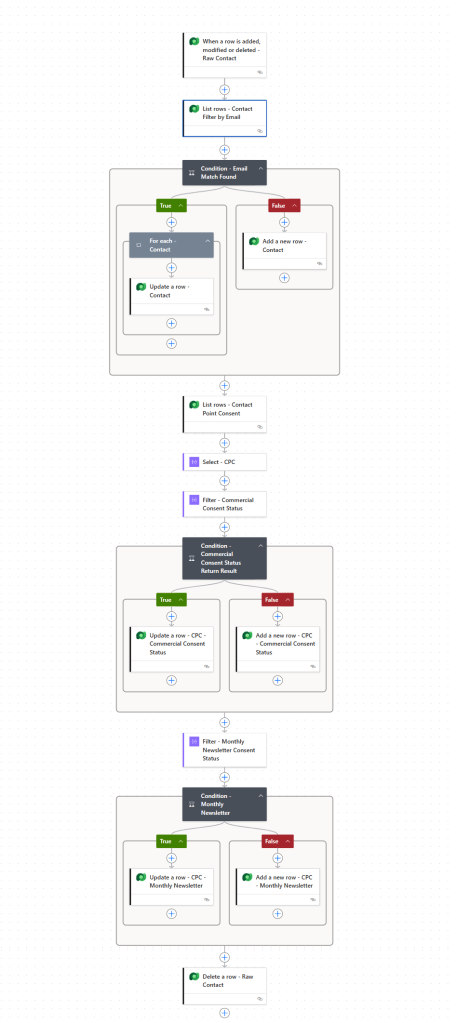
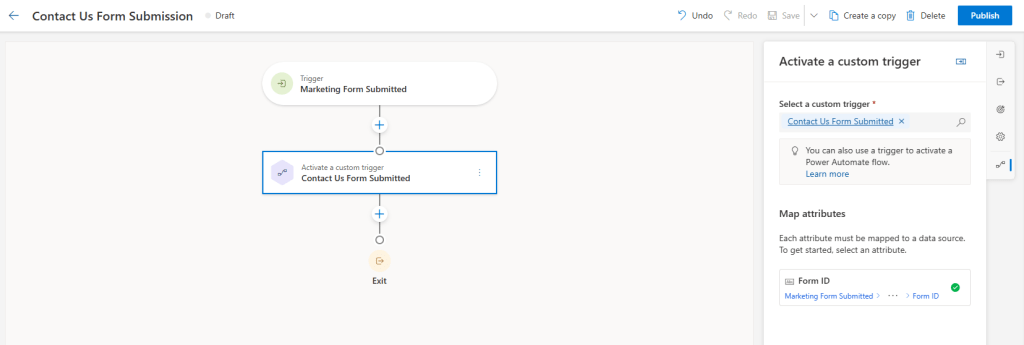
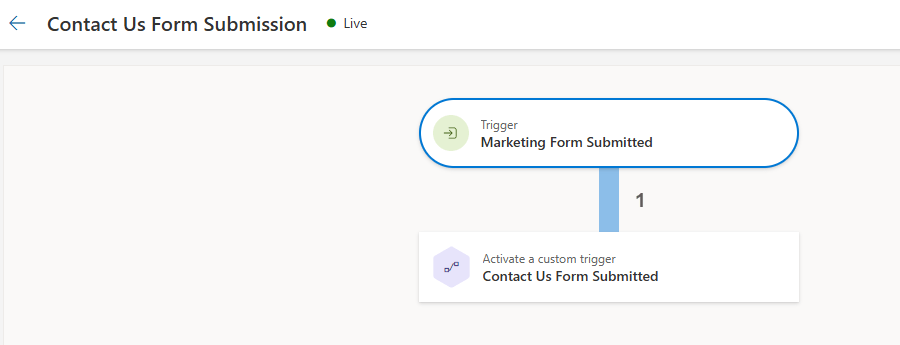
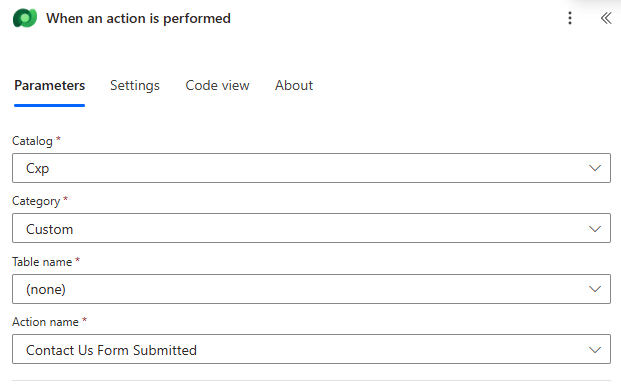
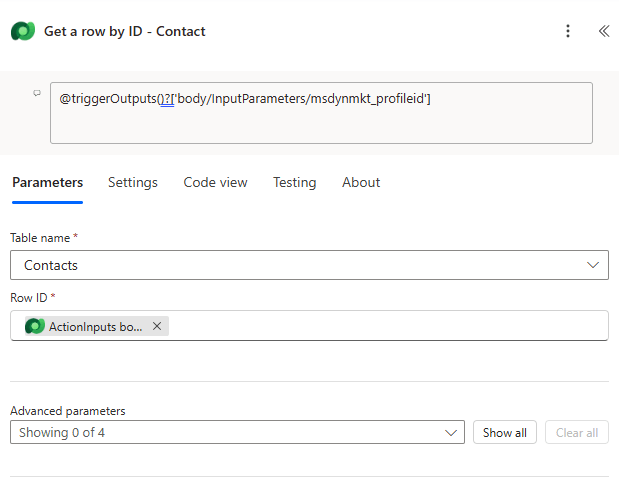
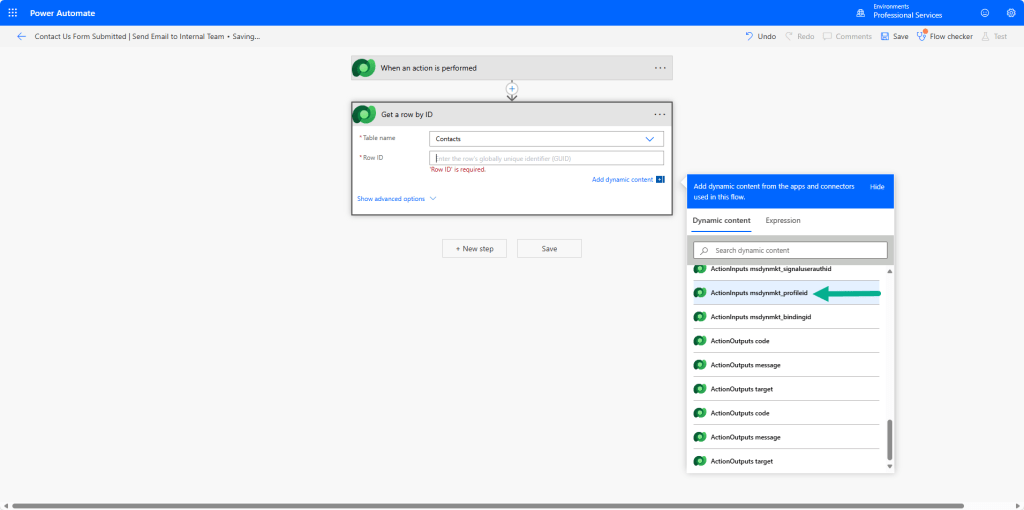
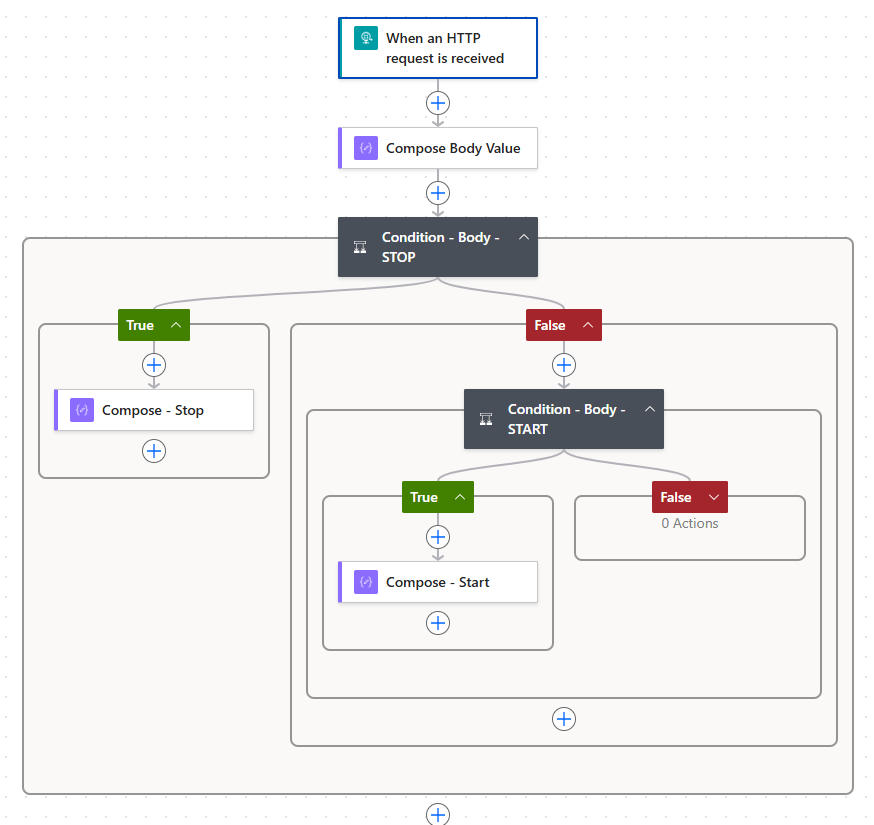
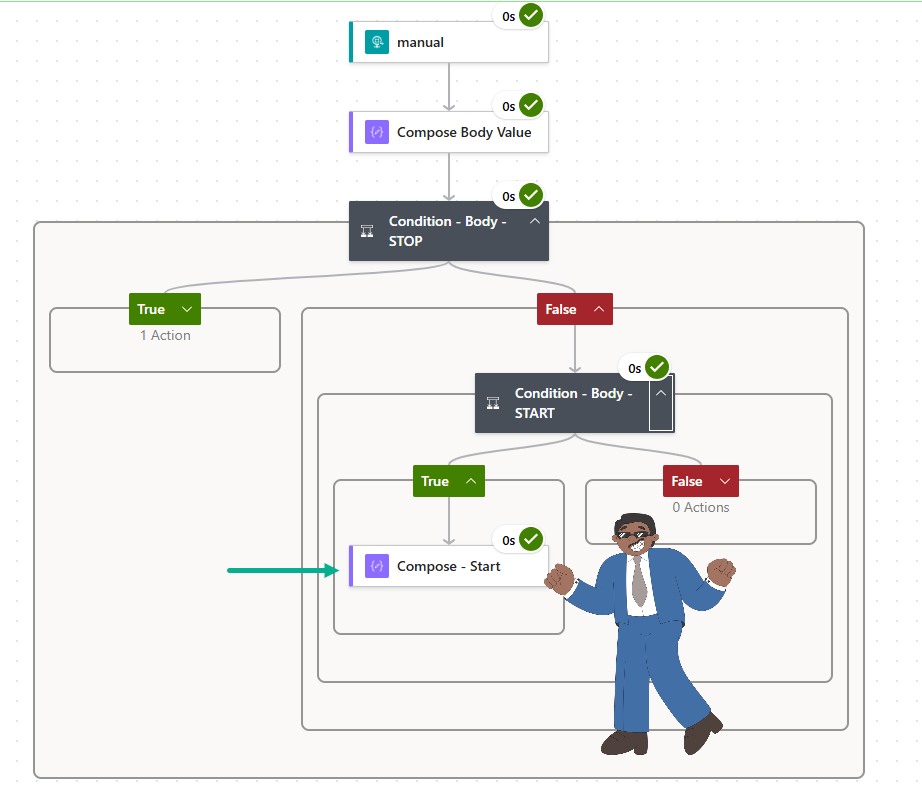
Overview of Power Automate Flow
This is the overview of the Power Automate Flow that we’re about to create.
Scope of this blog: I’ll just create a simple Flow, and end it at showing the output of STOP/START – as the purpose of this blog is to show you how you can receive the responses.
Out of scope: From there, you can extend the Flow to update Contact Point Consents or to facilate other business requirements.
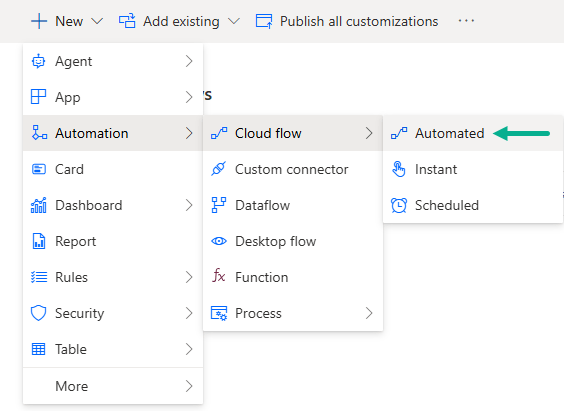
Build Power Automate Flow
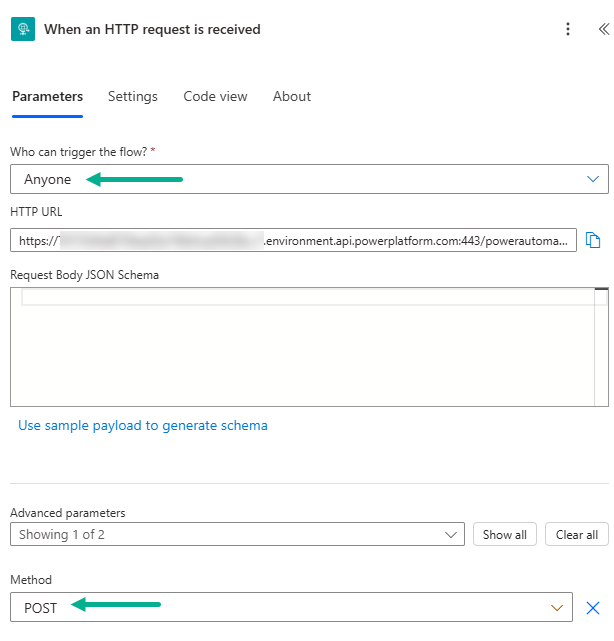
To do that, first, create a new flow with the trigger: When an HTTP request is received as a first action. Configure the action as below.
- Who can trigger the flow? → Anyone
- Method → POST
Once save the action, the URL will be generated. This will be our callback (webhook) URL that Twilio will post the customer’s response. We will copy the HTTP URL and paste in Webhook URL later.
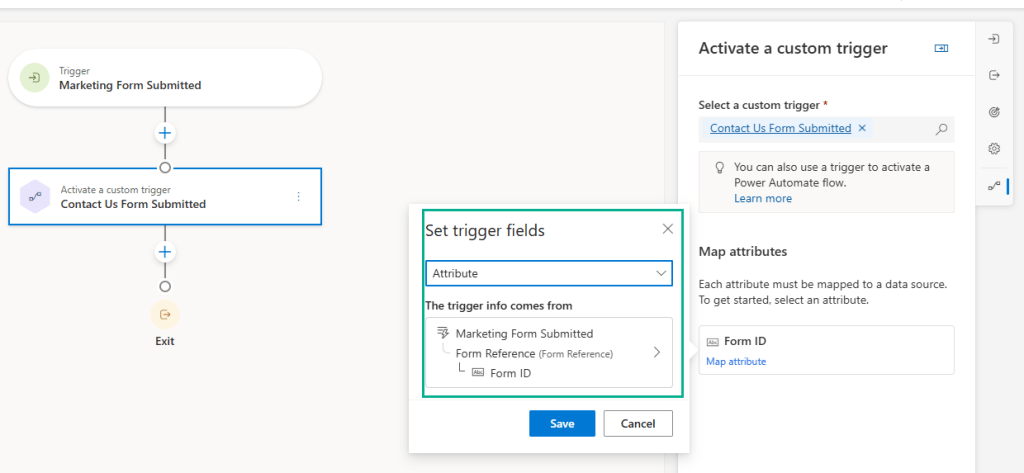
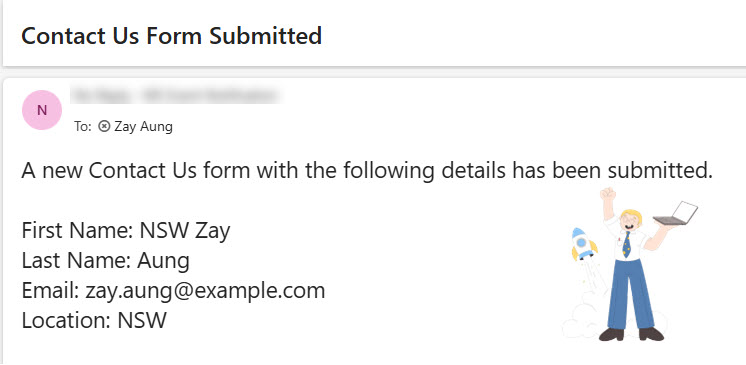
We will then add a Compose action to read the Body message from the above HTTP request.
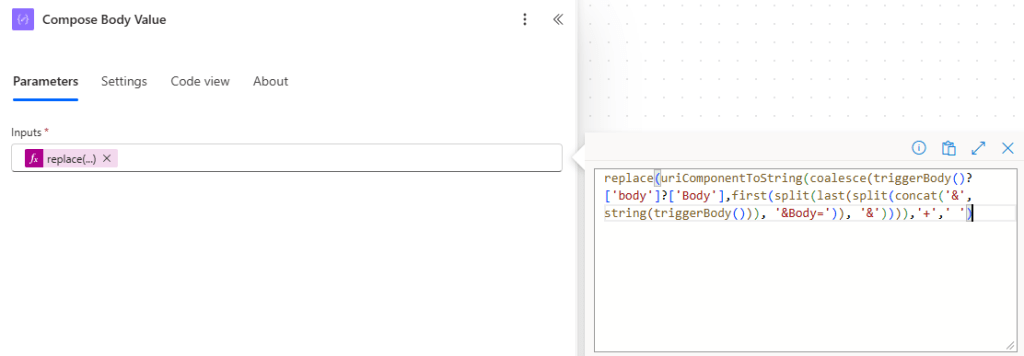
Here is the expression I’ve used to read the response from the customer.
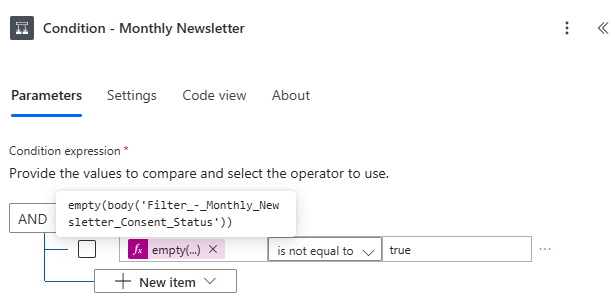
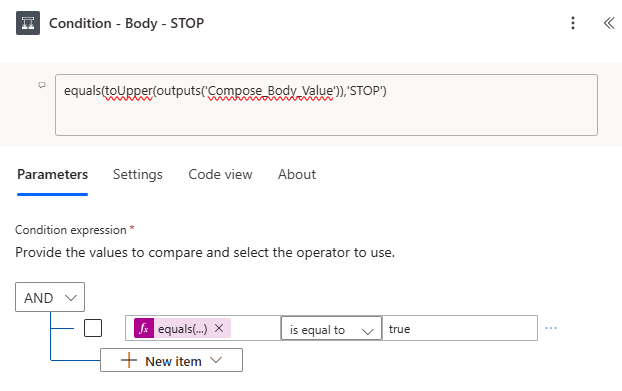
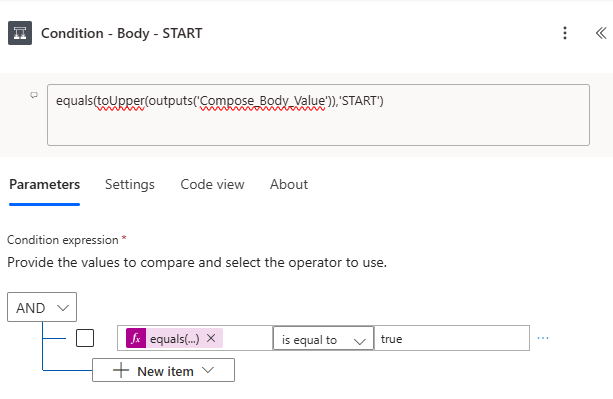
replace(uriComponentToString(coalesce(triggerBody()?['body']?['Body'],first(split(last(split(concat('&', string(triggerBody())),'&Body=')),'&')))),'+',' ')Then we will check the message whether it’s STOP or START. For example,
- If Body = STOP → update consent (Do Not Allow)
- If Body = START → update consent (Allow)
Once complete, Save and Publish the Flow.
Verify Caller ID in Twilio
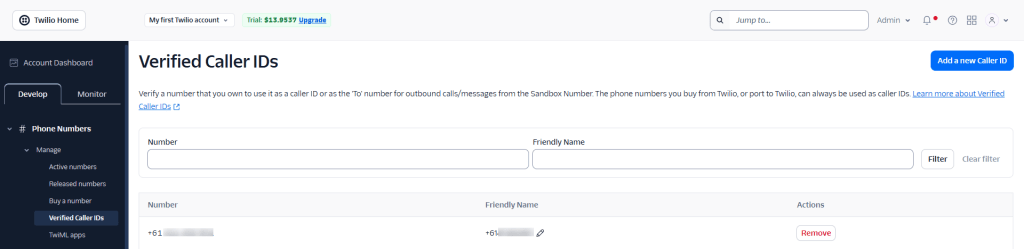
Next, we are going to configure webhook in Twilio. For that, login to Twilio account. Before we send the SMS from Twilio, we need to add a new Caller ID, and verify that you’re the owner the number.

Add your number and enter verification code sent to your mobile.

Once verified, you will see the number added to Verified Caller IDs list.
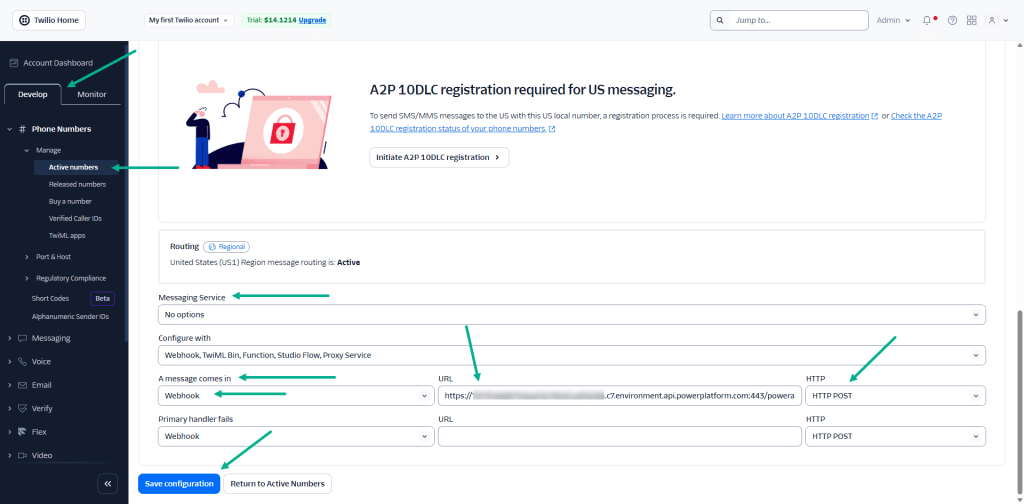
Configure Webhook URL in Twilio
Next, we’re going to configure Webhook URL. Let’s copy the HTTP URL from the Flow and paste it in Webhook URL. Once configured as per the screenshot, click Save configuration.
Now Twilio will POST any inbound SMS to your flow.
Testing the Setup
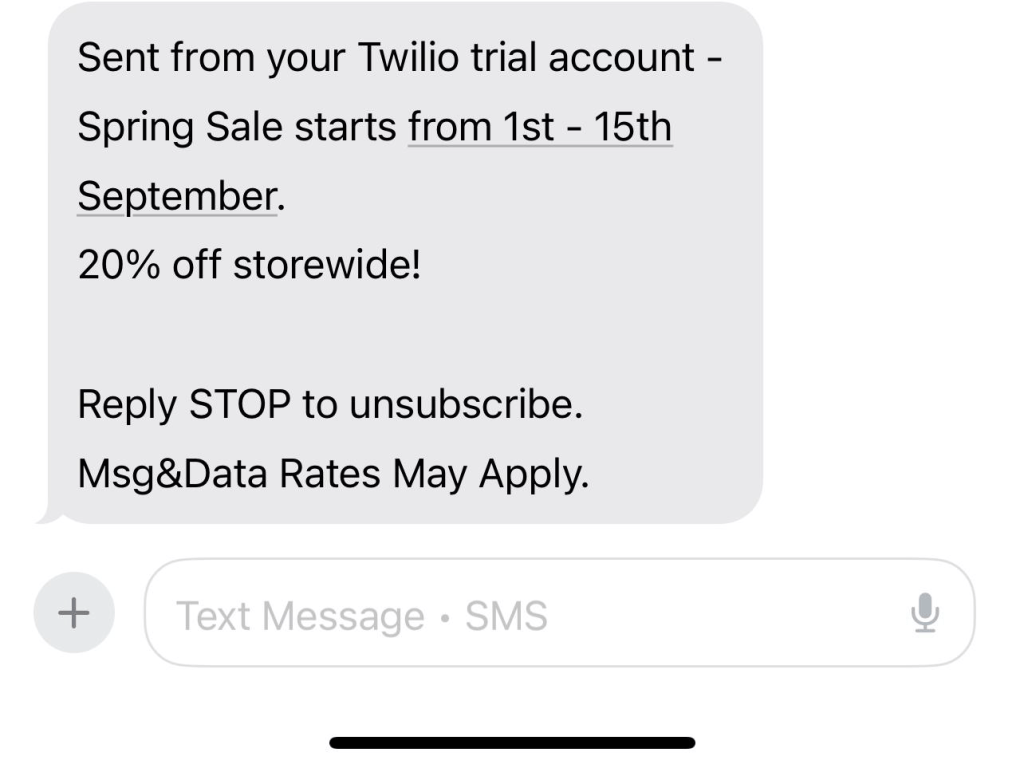
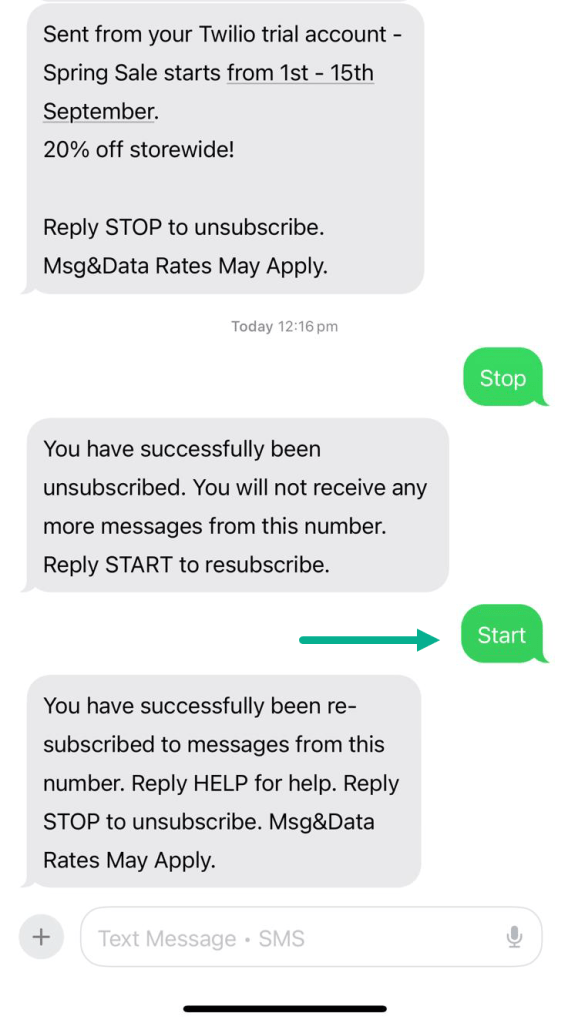
We’re now ready to test by sending SMS to the verified number. In this example, I’m going to send a Sale alert SMS to my verified number.
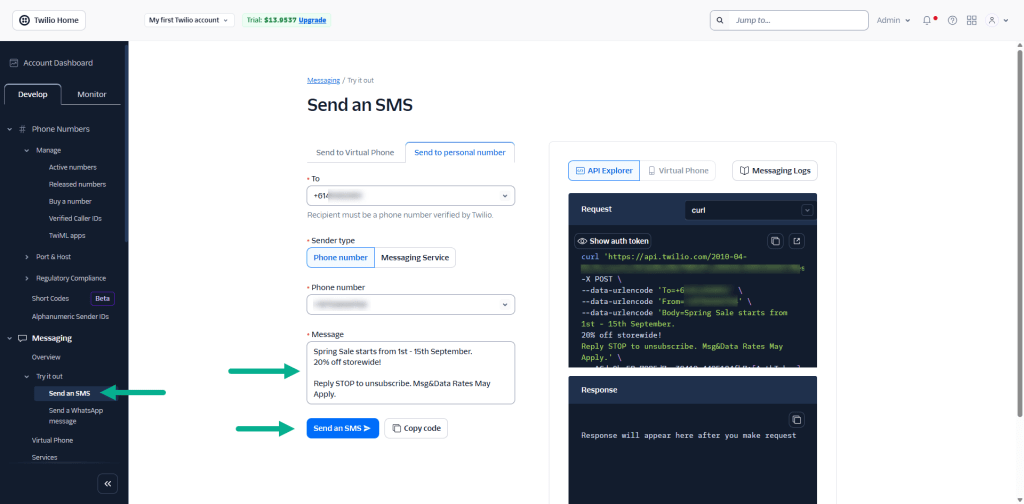
Once clicked Send an SMS, Twilio will send the SMS to the verified number.
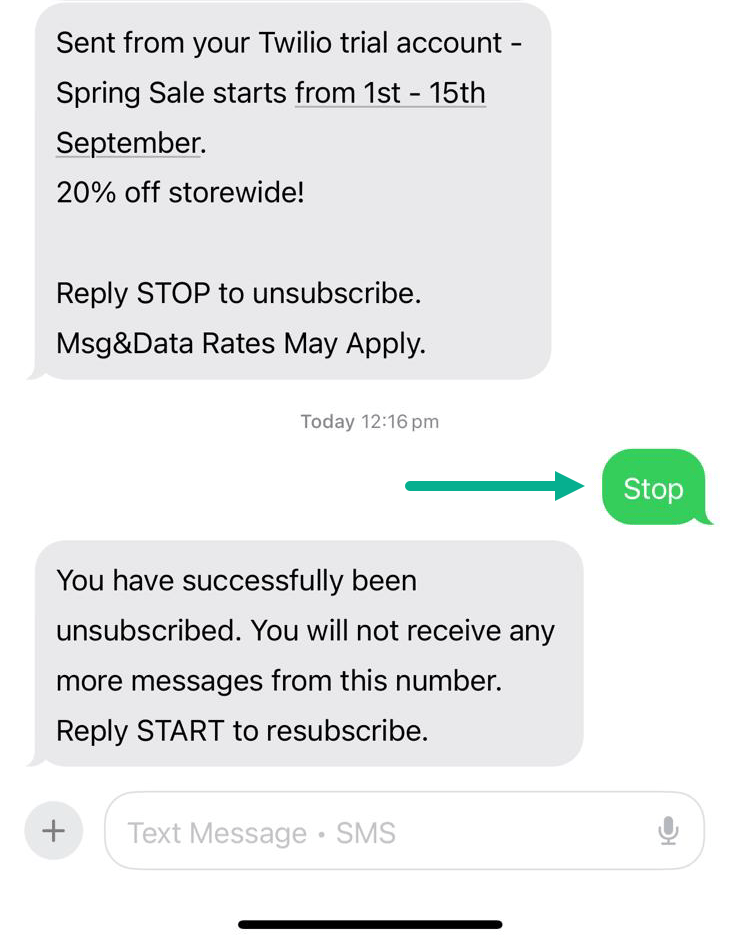
Reply with Stop. Twilio will POST ‘the reply’ to the flow. The flow will capture it and follow the Stop path.
Reply with Start. The flow will capture it, and follow the Start path.
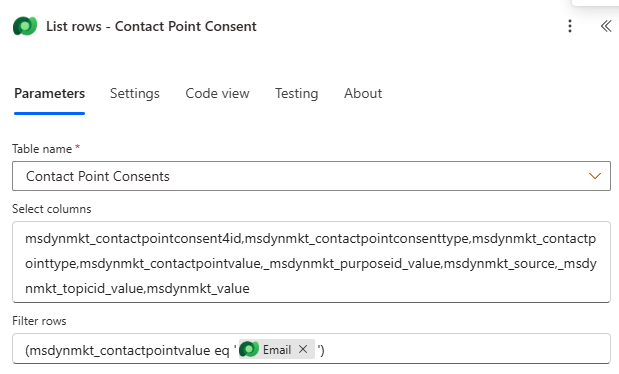
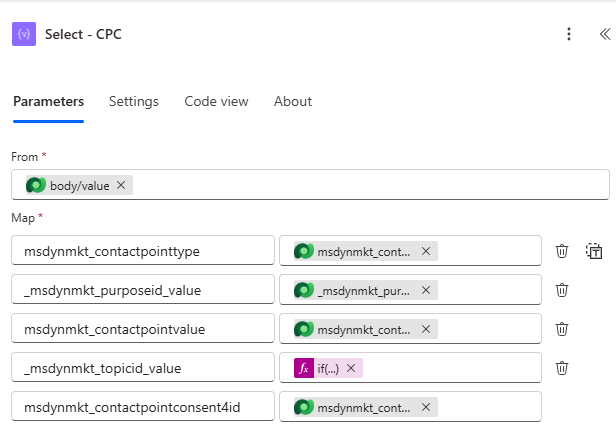
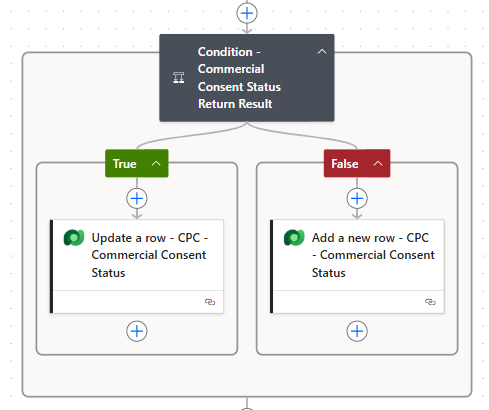
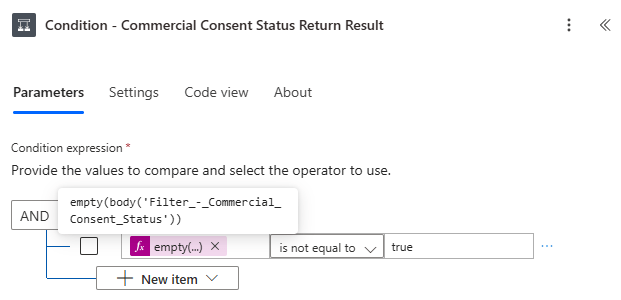
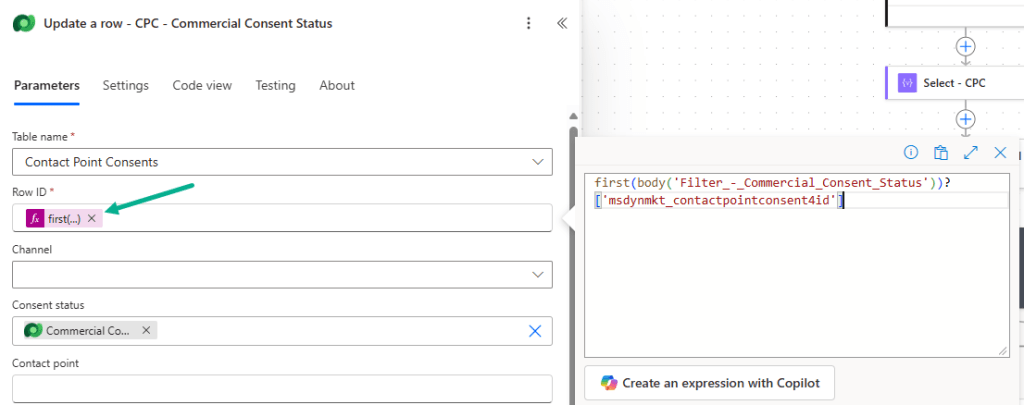
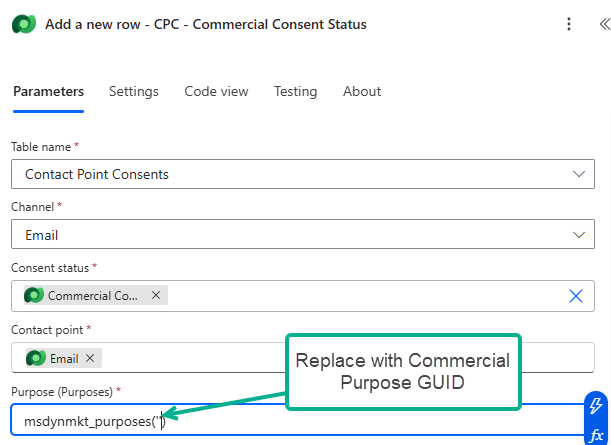
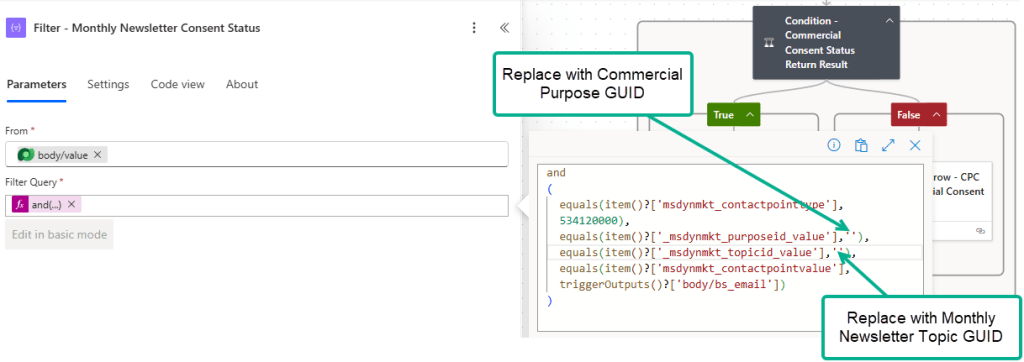
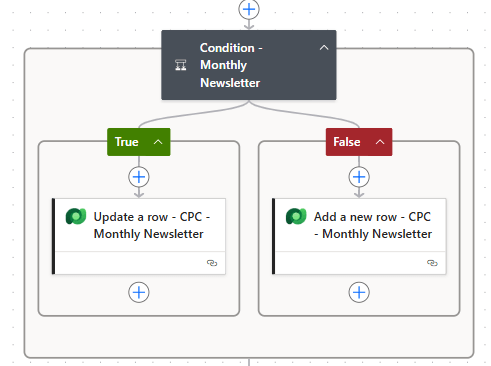
At this point, you can extend your flow to update Contact Point Consents records.
Summary
In this post, we explored how to make Twilio and Dynamics 365 Customer Insights – Journeys work together for inbound SMS. By configuring a callback URL and using Power Automate as a listener, you can capture customer replies in real time. This allows you to keep SMS consent fully in sync when customers text STOP or START.