

Customise Real-time Marketing Form
In this blog series, I’ll walk you through how to send emails to internal users or teams based on a contact’s Location – for example, if the location is NSW, the system will send an email to the NSW Customer Service Team – upon Form submission in Real-time Customer Insights – Journeys. We’ll achieve this by using a Custom Trigger in combination with Power Automate.
Note: Although this example is based on Form submissions, the same concept applies to other trigger points like Event Registrations.
Series Overview
I’ve broken this topic down into the following parts:
- Customise Real-time Marketing Form <- You are here
- Configure Custom Trigger
- Build Power Automate Flow
- Create Real-time Journey
This is the first post of this series and will focus on Customise Real-time Marketing Form.
Create Custom Columns in Dataverse
Before customising the Form, let’s create some columns in Dataverse to store the internal email addresses.
I won’t go into detail on how to create Dataverse columns using Power Apps, as there are already plenty of well-documented resources available.
As best practice, create a Solution first and then add the new columns within that solution to enable easy packaging and deployment across environments.
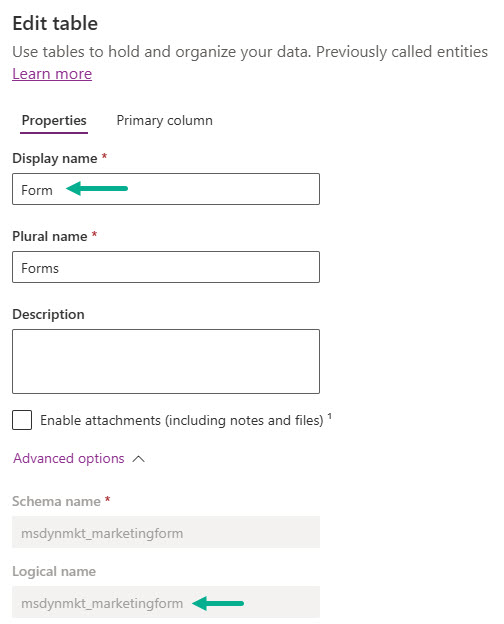
Note: Make sure you create in the correct Form table i.e., Logical name =
msdynmkt_marketingform.
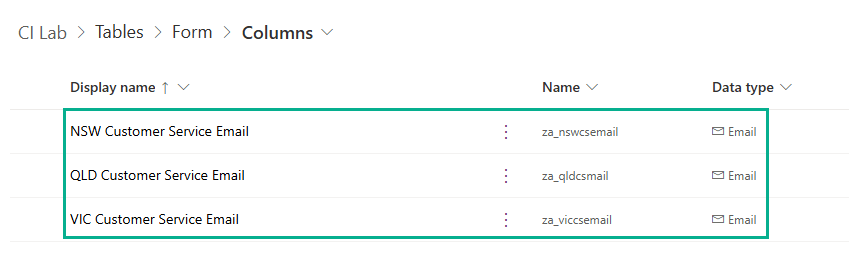
In this example, I’ve created the following three columns – all are the same configuration: Data type = Single line of text and Format = Email. Column names:
- NSW Customer Service Email
- QLD Customer Service Email
- VIC Customer Service Email

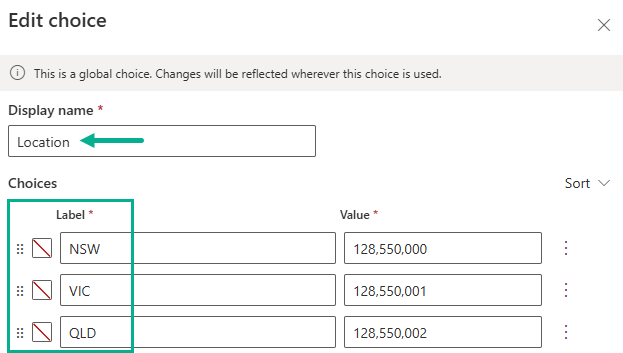
Additionally, we will also create a custom column in the Contact table called Location where Data Type = Choice, which will store the Location of the Contact.

Add Columns to the Form
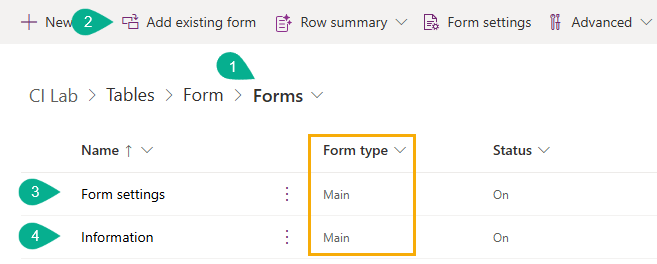
Now, let’s include the three email columns in the Real-time Marketing Form.
- Click Forms in Form table
- Click Add existing form
- Add Form settings
- Add Information
Note: Make sure you select Form type =
Main
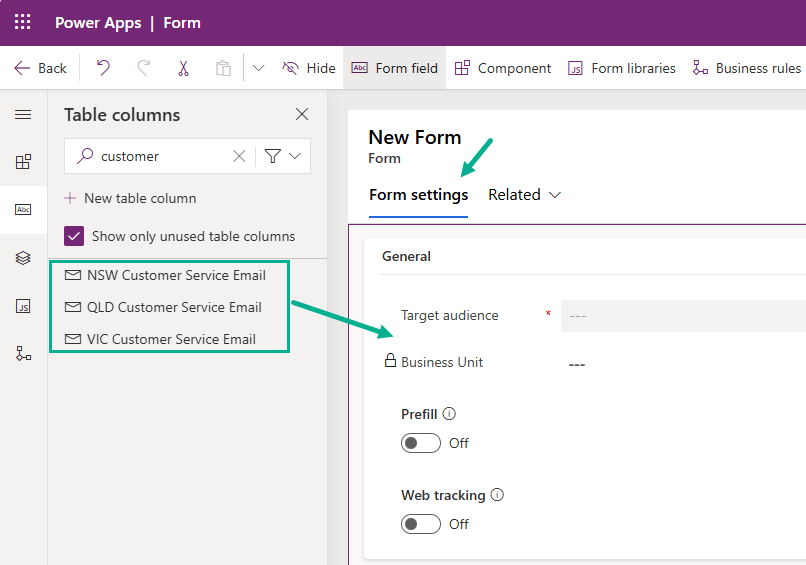
Configure Form Settings
Now, we’re going to configure Form settings Form.
- Open Form settings
- Click Form settings tab
- Drag and drop the following three columns just below of
Target audiencecolumn- NSW Customer Service Email
- QLD Customer Service Email
- VIC Customer Service Email
- Click Save and publish.

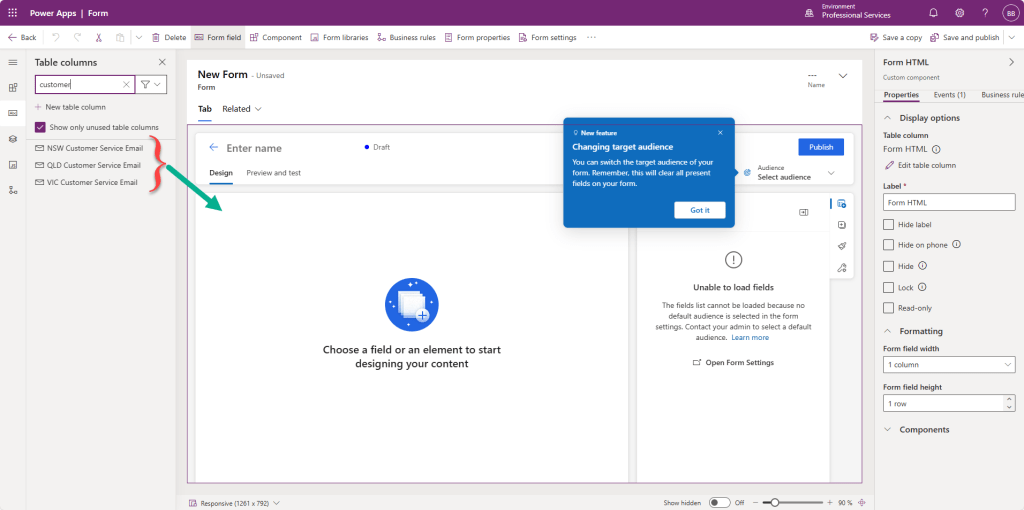
Configure Information Form
- Open Information Form
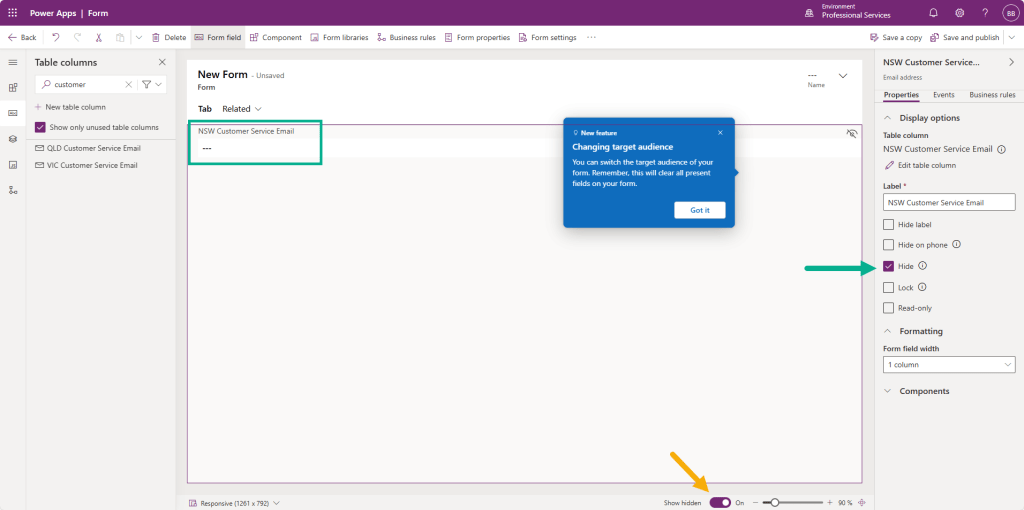
- Drag and drop NSW Customer Service Email onto the Form
- On the right panel, check Hide under Display options
- (Optional Tip: Set Show hidden = On to verify if the column is already added.)
- Repeat for the QLD and VIC email columns
- Click Save and Publish
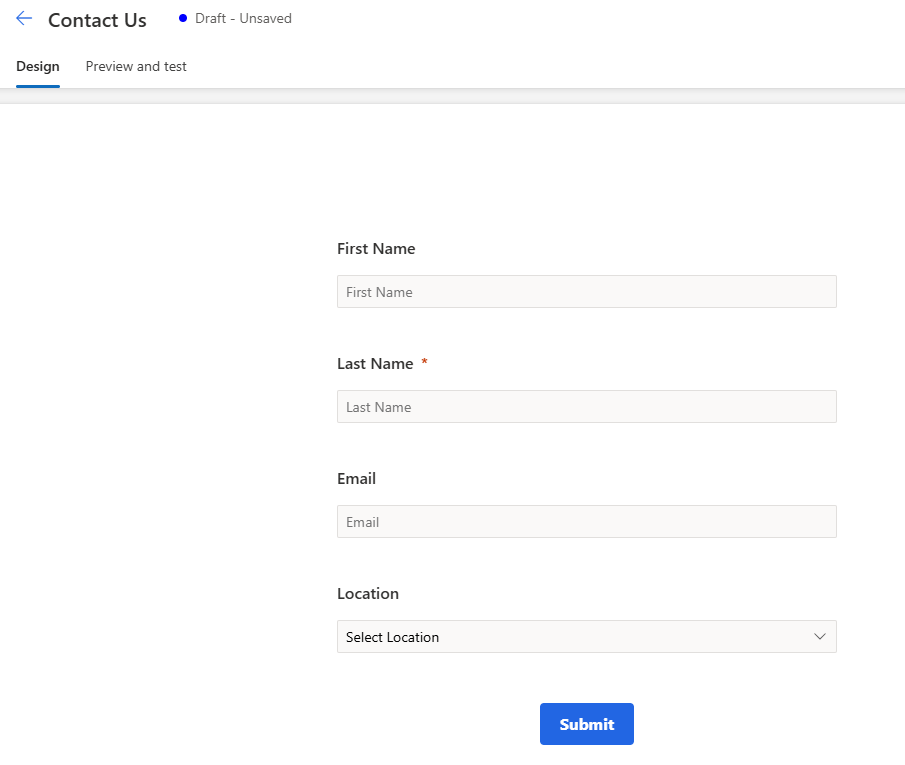
Create the Contact Us Form
Now, create a basic Contact Us form with the following fields: First Name, Last Name, Email and Location (the custom field that we created in the above) and Submit button.
Follow the below steps.
- Go to Real-time journeys
- Go to Channels
- Go to Forms
- Click [+New]

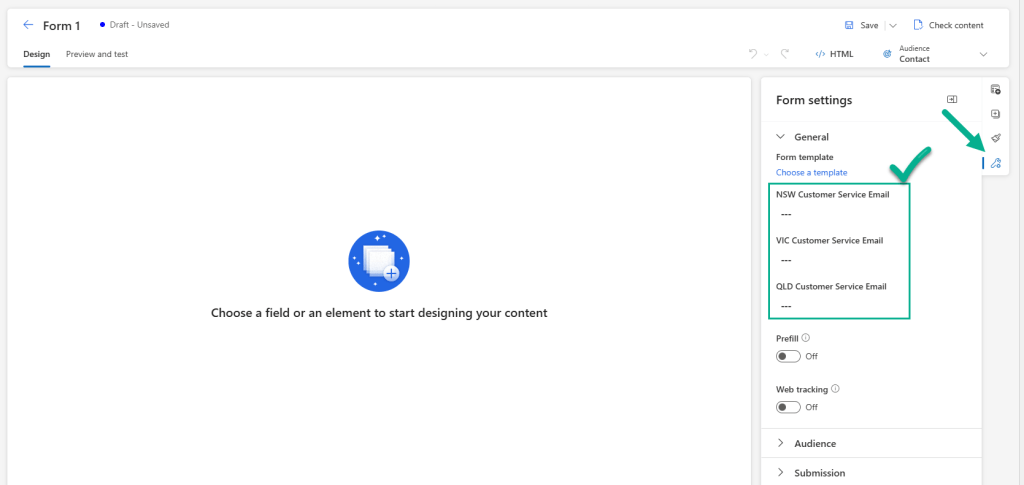
Before adding fields, go to Form settings and confirm that the three internal email columns are included.
Then drag and drop the necessary fields onto the canvas.
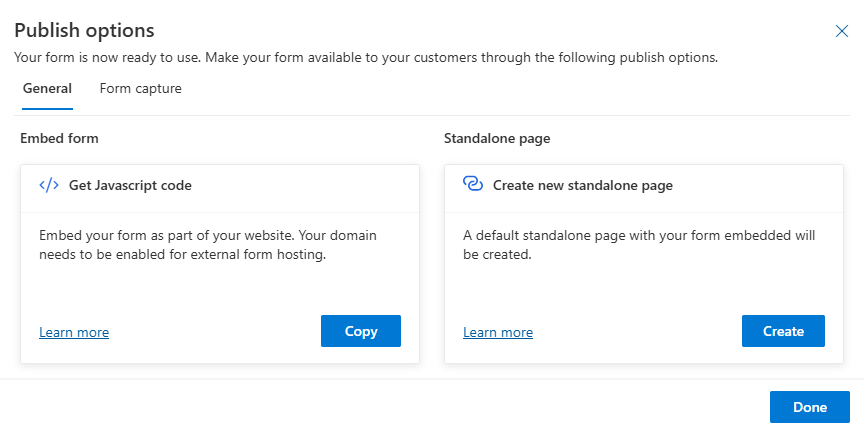
Once done and no error, click Publish to be ready to be used. We’ll come back to the Form once we’ve set up other components for the result.
Summary and Next Steps
In this post, we’ve:
- Created three internal email fields in Dataverse.
- Created a Location field in the Contact table.
- Customised the real-time marketing form to include internal fields.
- Created the basic Contact Us form.
In the next post – Configure Custom Trigger (Part 2), we will walk through how to create a Custom Trigger to use within the Real-time Journey – extending functionality to Power Automate Flow.
