In this post, I’ll walk you through how to add the Contactability grid to a custom form in Dynamics 365. While this grid is included by default in Customer Insights – Journeys, you may need to add it to other applications like Customer Service Hub.
- What is the Contactability Grid?
- Use Case Example
- Access the Form Designer
- Security Permissions Reminder
What is the Contactability Grid?
The contactability grid is a powerful tool that allows you to manage consent across every channel and line of business in your organisation. It provides a comprehensive view of customer communication preferences, making it easy to see and update consent settings for email, SMS, and custom channels.
Use Case Example
Consider a scenario where customers call your contact center to manage their communication preferences. By adding the contactability grid to your Customer Service Hub forms, agents can quickly update these preferences without switching applications.
Access the Form Designer
The steps are pretty simple, same as what you would design the Form, and add components.
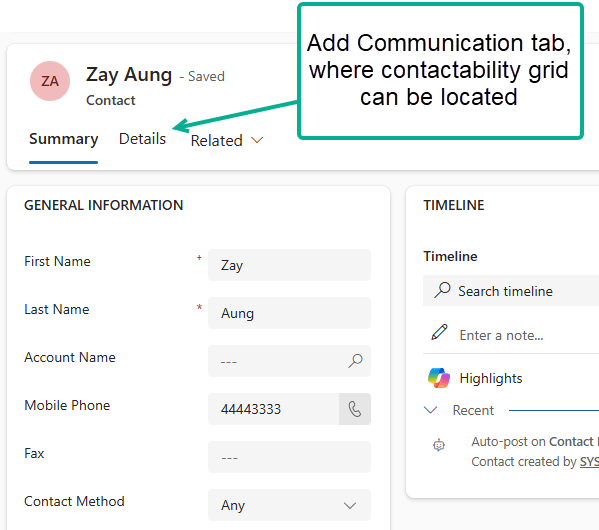
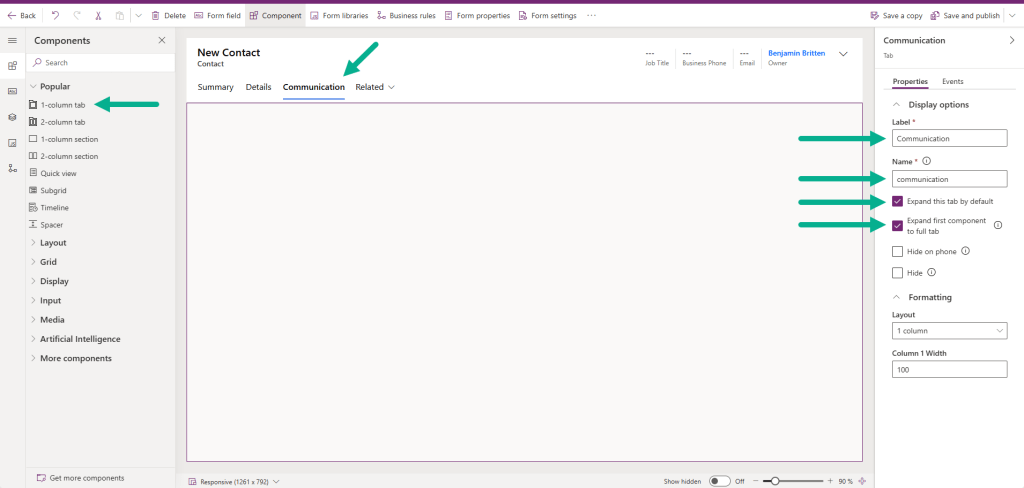
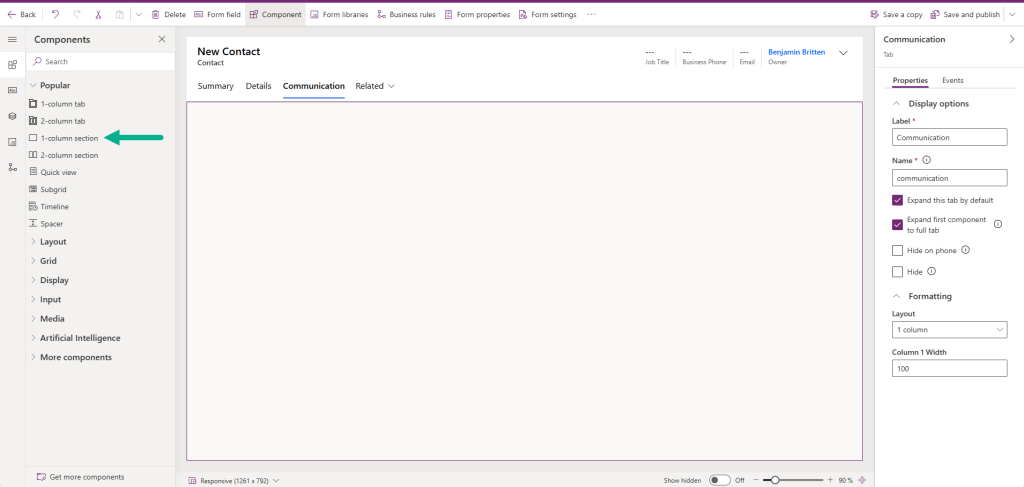
First, Open the form in Power Apps where you want to add the Contactability grid. Add a 1-column tab to the form canvas – for example, name it Communication. Additionally, make sure to select Expand this tab by default and Expand first component to full tab.
Next, add 1-column section to Communication tab.
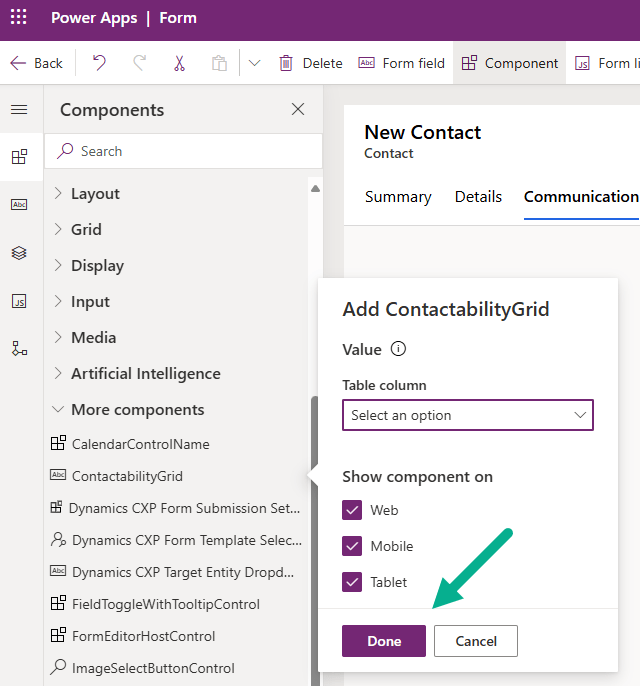
Next, we’re going to add Contactability grid to the Form. If you cannot find it in More components section, click Get more components and add it.

Once added, select which platforms the Contactability grid should be available for (Web, Movile, Tablet) and click Done.
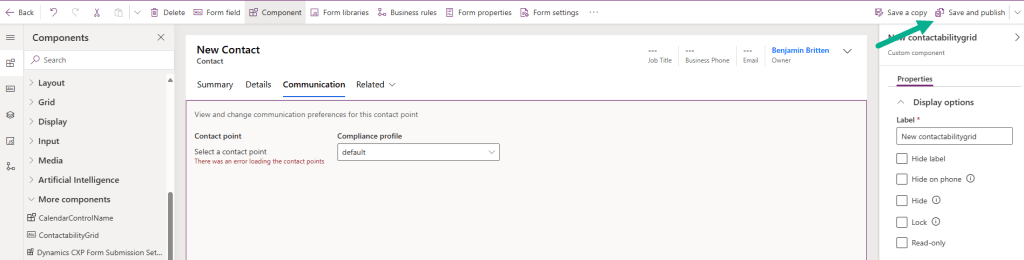
Once added, you’ll see Contactability grid added to the Form. Click Save and publish.
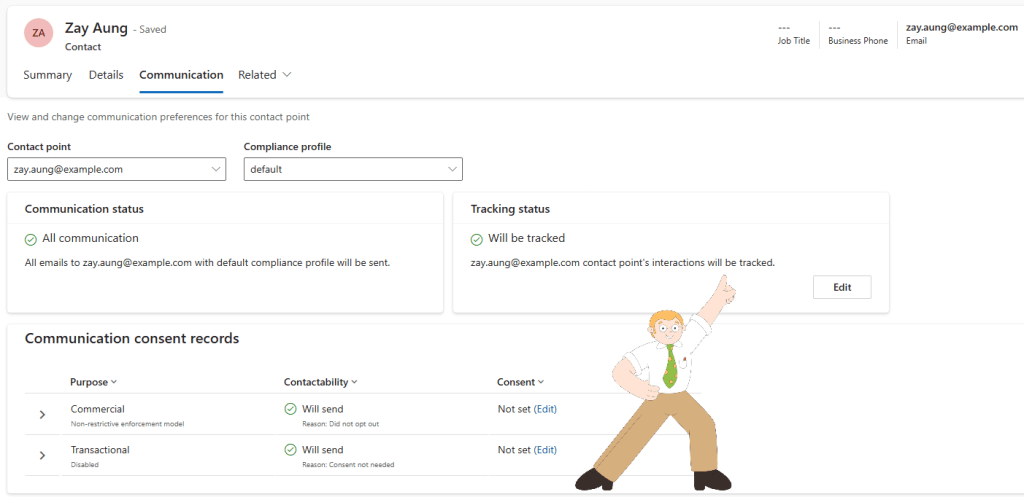
Finally, you will see Communication tab with Contactablity grid – the same as what you’d see in Customer Insights – Journey – Contact form by default. This will allow other application or team – for example, Customer Service team to update Contact’s contactability preference.
Security Permissions Reminder
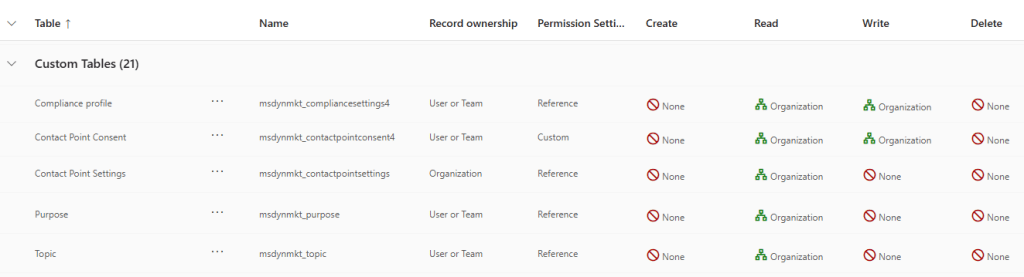
Update: One thing to call out – make sure users have the required security permissions to see or interact with the Contactability control. Thanks to Megan V Walker for highlighting this! If user is not given right priviliges, the below error will be prompted.

Ensure the relevant privileges are granted for the below five tables covering Email and SMS channels (and any custom channel tables, if applicable).